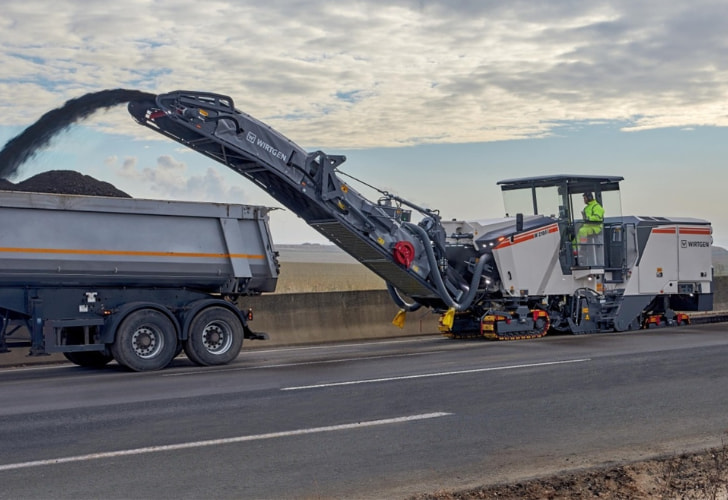
A road milling machine, or a cold planer , is a heavy, expensive piece of equipment, and it deserves more than occasional attention. From the moment a cold planer hits the pavement, it begins to spare no effort in grinding the surface. So, routine maintenance of the cold planer is non-negotiable. It is the difference between steady performance and repeated, costly breakdowns. First of all, only trained operators should run and service the machine, and everyone on the team must follow the manufacturer's manual. Good habits, such as correct oil grades, timely filter changes, and correct parts, make the rest of the maintenance work meaningful.

(Image Source: wirtgen-group.com)
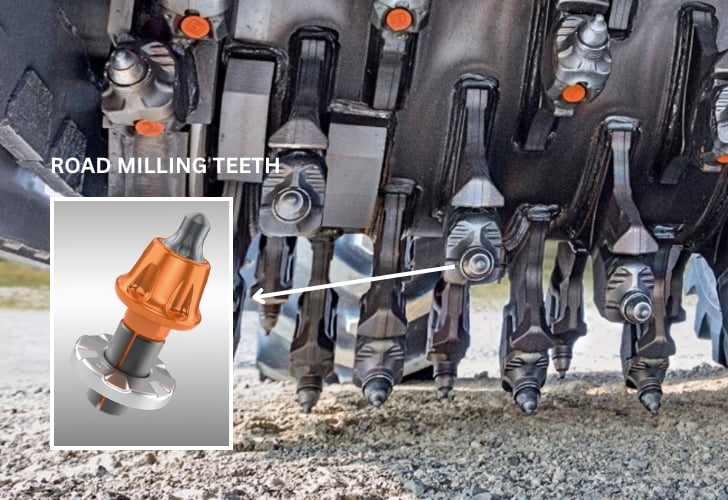
1. Road milling teeth are the cutting tips that engage directly with the road surface.
They are the fastest-wearing components of the machine. Check them regularly. Key points to remember:
Match the job: Use asphalt milling teeth for asphalt, and concrete milling teeth for concrete. Using the wrong type reduces efficiency, increases wear on tool holders, and raises operator fatigue.
Watch for signs: A white streak behind the machine is a sure sign of a bad tooth. Don't wait until several streaks appear. Replace as soon as you spot one.
Replace on time: Worn, unevenly worn, cracked, or broken teeth must be replaced immediately. Once the carbide tip is gone, the body and even the holder will wear rapidly.
Avoid mixing new teeth with heavily worn ones or new holders with old ones. This creates uneven grooves.
When moving from light-duty jobs (residential streets) to heavy-duty projects (interstates), re-rack the drum to start fresh.
Save partially used teeth with 60–70% life remaining. These are ideal emergency replacements because they maintain a consistent wear pattern better than brand-new bits.
Never run a milling project without extra teeth and holders on site. Having spare milling bits and tool holders ensures the crew can replace worn or broken parts immediately, avoiding downtime that can cost thousands per hour.
Original equipment teeth are the safest option. Third-party bits may look cheaper but often come with risks such as short lifespan, uneven wear, breakage, or even "over-durability" that stresses the holders. Always test in small batches before bulk purchases.

(Image Source: wirtgen-group.com)
2. Tool holders secure the teeth and are much more expensive to replace.
Extending their service life is essential:
Follow wear indicators: Most original manufacturers' holders have wear marks. Replace them on time, usually in full sets, to ensure consistent milling quality.
Use one-time bolts: Tool holder bolts are self-locking and not reusable. Reusing them risks loosening (leading to lost holders) or jamming (making removal difficult).
Keep holders tight: Loose holders increase stress on both teeth and seat bores.
Replace damaged holders: Tool holder replacement is not optional. It's critical for maintaining both performance and safety. Broken or missing holders quickly damage the bore seat, which is far more expensive to repair than replacing a holder.
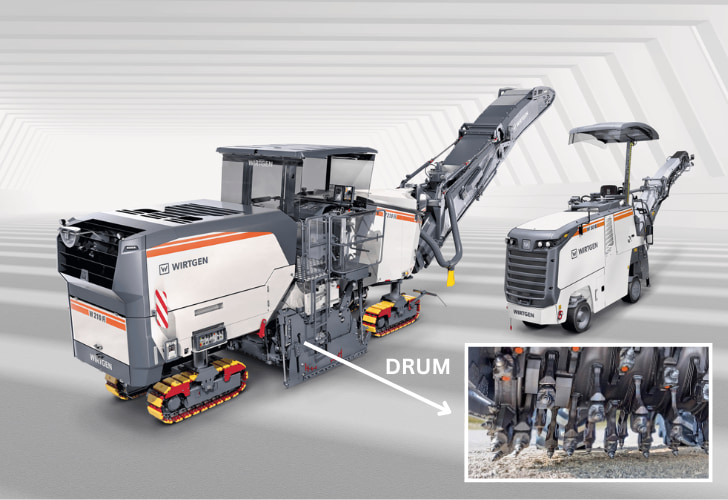
3. No matter how powerful the engine is, if the milling drum isn't in proper working condition, you won't get productivity or surface quality.
Regular care of the drum and its supporting components is non-negotiable. Walk around the machine to check if the milling drum is in good condition. Besides, pay close attention to the kicker paddles, whose job is to move the removed material out of the housing. If paddles are missing or worn down, material builds up inside the housing, increasing stress on the entire machine. What's worse, trapped material will get stuck on the conveyor belt and eventually slice through it.

(Image Source: wirtgen-group.com)
Additionally, check housing wear parts regularly, including front moldboard, rear scraper, and side plates. They may look secondary, but these parts are in constant contact with the ground. Once the wear-resistant layer is gone, the base material erodes quickly. The result? Severe material leakage, uneven milling, and expensive repairs. Replacing them in time is far easier and cheaper than letting them wear through.
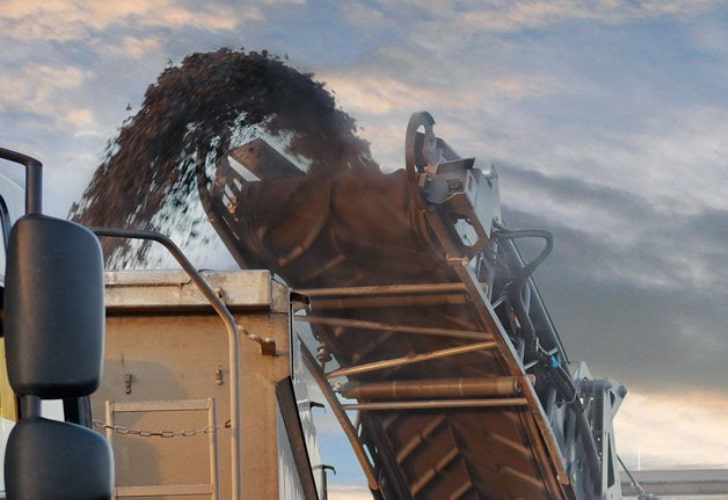
4. A healthy conveyor system depends on clean belts, well-lubricated rollers, and timely inspections.
In most cases, belt failures can be traced back to damaged rollers. And damaged rollers, in turn, are often the result of poor lubrication.

(Image Source: wirtgen-group.com)
Proper belt tension is critical. A belt that's too tight puts unnecessary stress on the rollers and drive system, while a belt that's too loose risks slippage and uneven wear. Regularly adjust the tension to the manufacturer's specifications.
Never leave material sitting on the belt after the machine stops. At the end of each workday, thoroughly clean the belt to prevent buildup. This simple step reduces wear and protects the belt surface from embedded debris.
Lubricating grease is the life of the rollers. Consistently check roller condition, and apply fresh lubricating grease as part of your daily maintenance routine. Without proper lubrication, rollers seize up, wear unevenly, and quickly damage the belt.
During operation, stay alert for signs of roller or belt damage, unusual noise, vibration, or material tracking off-center. Catching small problems early prevents sudden breakdowns and extends the overall service life of the conveyor system.
5. The spray system is another crucial part of your road milling machine maintenance, because water does more than just cool the cutting tools.
It keeps the teeth working smoothly, helps control silica dust, and reduces material buildup on the machine. Always confirm that water is flowing properly before starting work. Don't ever try dry milling because damp material actually cleans up faster and more effectively. According to Tom Chastain from Wirtgen, adding a light dose of inexpensive laundry soap into the water tank is helpful. Just remember to fill the tank with water first and then add the soap to prevent excessive foaming.
6. Regular oil and filter changes are essential to the long-term health of the machine.
Skipping or delaying this service may not show immediate damage, but it silently shortens the equipment's lifespan. Always use the recommended grade of oil; higher grades are acceptable, but never downgrade to a lower one. When topping up, stick to the same brand and grade that's already in the system. Mixing different formulations can trigger chemical incompatibility and lead to costly issues. Many filters and control panels come with clogging indicators, but don't rely on those alone as an excuse to skip replacements. During every oil or filter change, check carefully for signs of metal or rubber debris. These are often early warnings of serious wear inside the machine that should be investigated immediately.
7. The electrical system on a milling machine is both complex and critical.
To keep it reliable, a few rules must be followed. Always connect in parallel if external power is needed. Avoid plugging or unplugging any device or connector while the system is live; "hot swapping" can instantly destroy components. Welding requires extra caution: switch off the control panel, remove the key, disconnect the battery, and isolate sensitive electronics before striking an arc. Operators should also use the emergency stop only for emergencies, not for routine shutdowns. Regular shutdowns must follow the proper sequence: idle the engine, press the stop button, and then switch off the main power.
When troubleshooting electrical faults, remember that indicator lights only confirm that power is reaching a component, not that the component itself is healthy. A structured step-by-step check, from switch to relay to solenoid valve, will help narrow down the true source of the problem.
8. Track pads are made of steel plates covered with rubber or nylon, and over time, the rubber or nylon naturally wears down.
While some wear is acceptable on less demanding surfaces, the real issue often comes from loose mounting bolts. If bolts are not tightened in time, pads wear faster and may even fall off. That’s why it’s essential to monitor them during operation, re-tighten when needed, and use thread-locking adhesive if necessary to keep them secure.
9. Operating a milling machine in hot weather requires extra attention.
High temperatures put stress on the engine and other systems, so regular cleaning becomes essential. The radiator should be cleaned within every 25 hours of operation to keep cooling efficient, and the machine itself should be washed down regularly. It helps prevent heat-related wear and buildup.
If the machine has accumulated around 100 hours of work and is expected to sit idle for a week or more, take time for a deeper service. Inspect all high-wear, sliding, and rolling components, and clean the hydraulic lines, fittings, and connections. Removing residue and oil in time.
Final thought
At the end of the day, good maintenance of your road milling machine always comes back to the basics. Teeth, holders, drums, conveyors, hydraulics, electrics, every system plays a part, and none can be ignored. Skipping small checks may not show immediate consequences, but over time, they add up to lost efficiency, higher costs, and avoidable downtime. The question to keep in mind is simple: have we maintained this machine well enough to deliver both performance and quality? If the answer is yes, the job will show it.
*All of the above images are not intended for commercial use.
